
In order to facilitate the import of your test results. We have created a suite of tests that perform this work. Those test are in our public GIT repository: Bitbucket
How to set up Bamboo
Follow the following steps
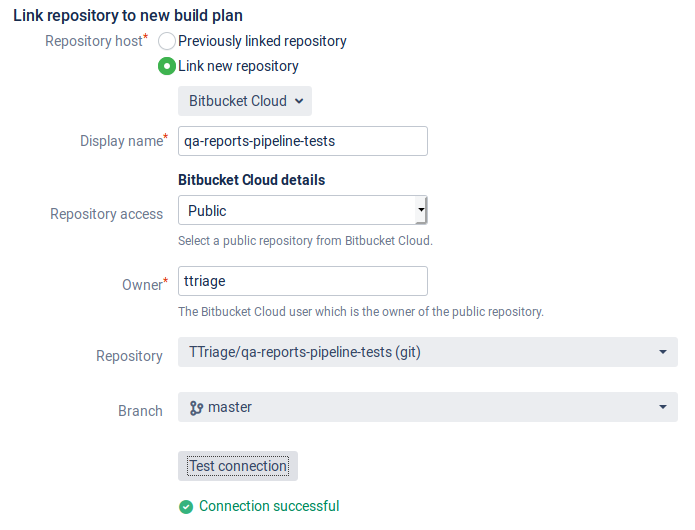
1. Navigate to your Bamboo and create a new Plan into a project, linking it to our qa-reports-pipeline-tests branch master.
- Bitbucket Cloud
- Display name: give the name you want to reference internally in Bamboo
- Repository access: pick "Public"
- Owner: ttriage
- Repository: wait for open repositories items to show up and pick qa-reports-pipeline-tests from the drop-down
- Branch: master
- Check connection to make sure that everything is well
 [click on the image to expand]
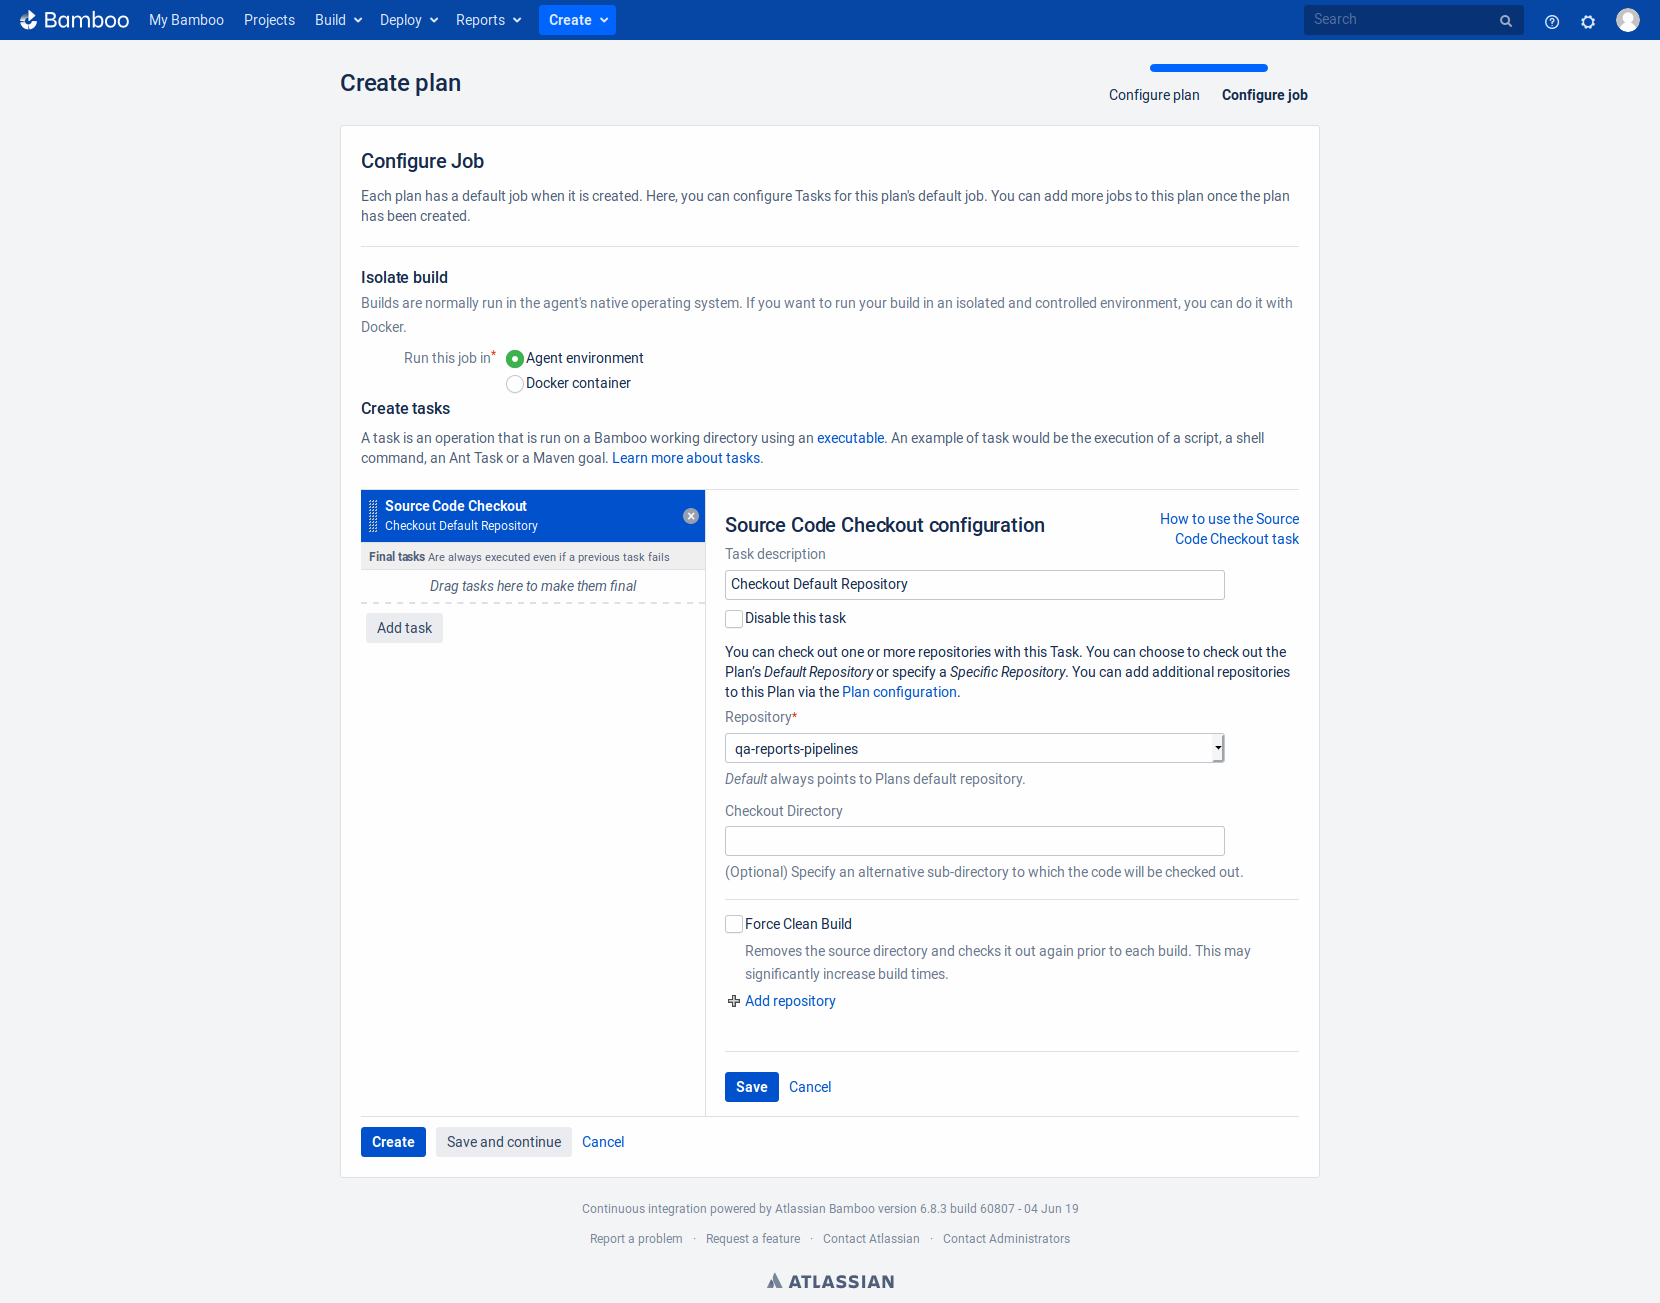
Once your plan was configured, you'll need to configure the job. At this point you are seeing a page similar like this:
 [click on the image to expand]
One of the tasks presents as default is the one that makes a checkout to the branch you set in the previous step.
2. Create a Maven task
The version of Maven you have to use in your Bamboo tasks should be 3.5.x or higher.
Why? There is a known issue present in previous versions of Maven and Surefire plugin that could cause the t-Triage integration does not work.
In order to push your tests results, it's necessary to create new Maven task
- Click on "Add task"
- Look for a Maven configuration
- Executable: pick a Maven executable from the drop-down. If you need to define a new executable capability, follow this Documentation. Take care to use mvn v3.5.x or high.
- Goals and options: clean compile test
-Dtest=BambooPushTestSuite
-Dqe.server.url=<YOUR_TTRIAGE_SERVER_URL>
-Dqe.server.port=<YOUR_TTRIAGE_SERVER_PORT>
-Dqe.server.clientId=<YOUR_TTRIAGE_SERVER_CLIENT_ID>
-Dqe.server.secretId=<YOUR_TTRIAGE_SERVER_SECRET_ID>
-Dqe.test.views=<YOUR_BAMBOO_PROJECTS>
-Dqe.bamboo.url=<YOUR_BAMBOO_SERVER_URL>
-Dqe.bamboo.username=<YOUR_BAMBOO_SERVER_USERNAME>
-Dqe.bamboo.token=<YOUR_BAMBOO_SERVER_PASSWORD>
- Follow this document How-To: Push Bamboo results to tTriage if you want to know all available parameters.
- Note: <YOUR_BAMBOO_PROJECTS> could be comma separated. Ie: Deploy, "Bamboo Jobs",Others
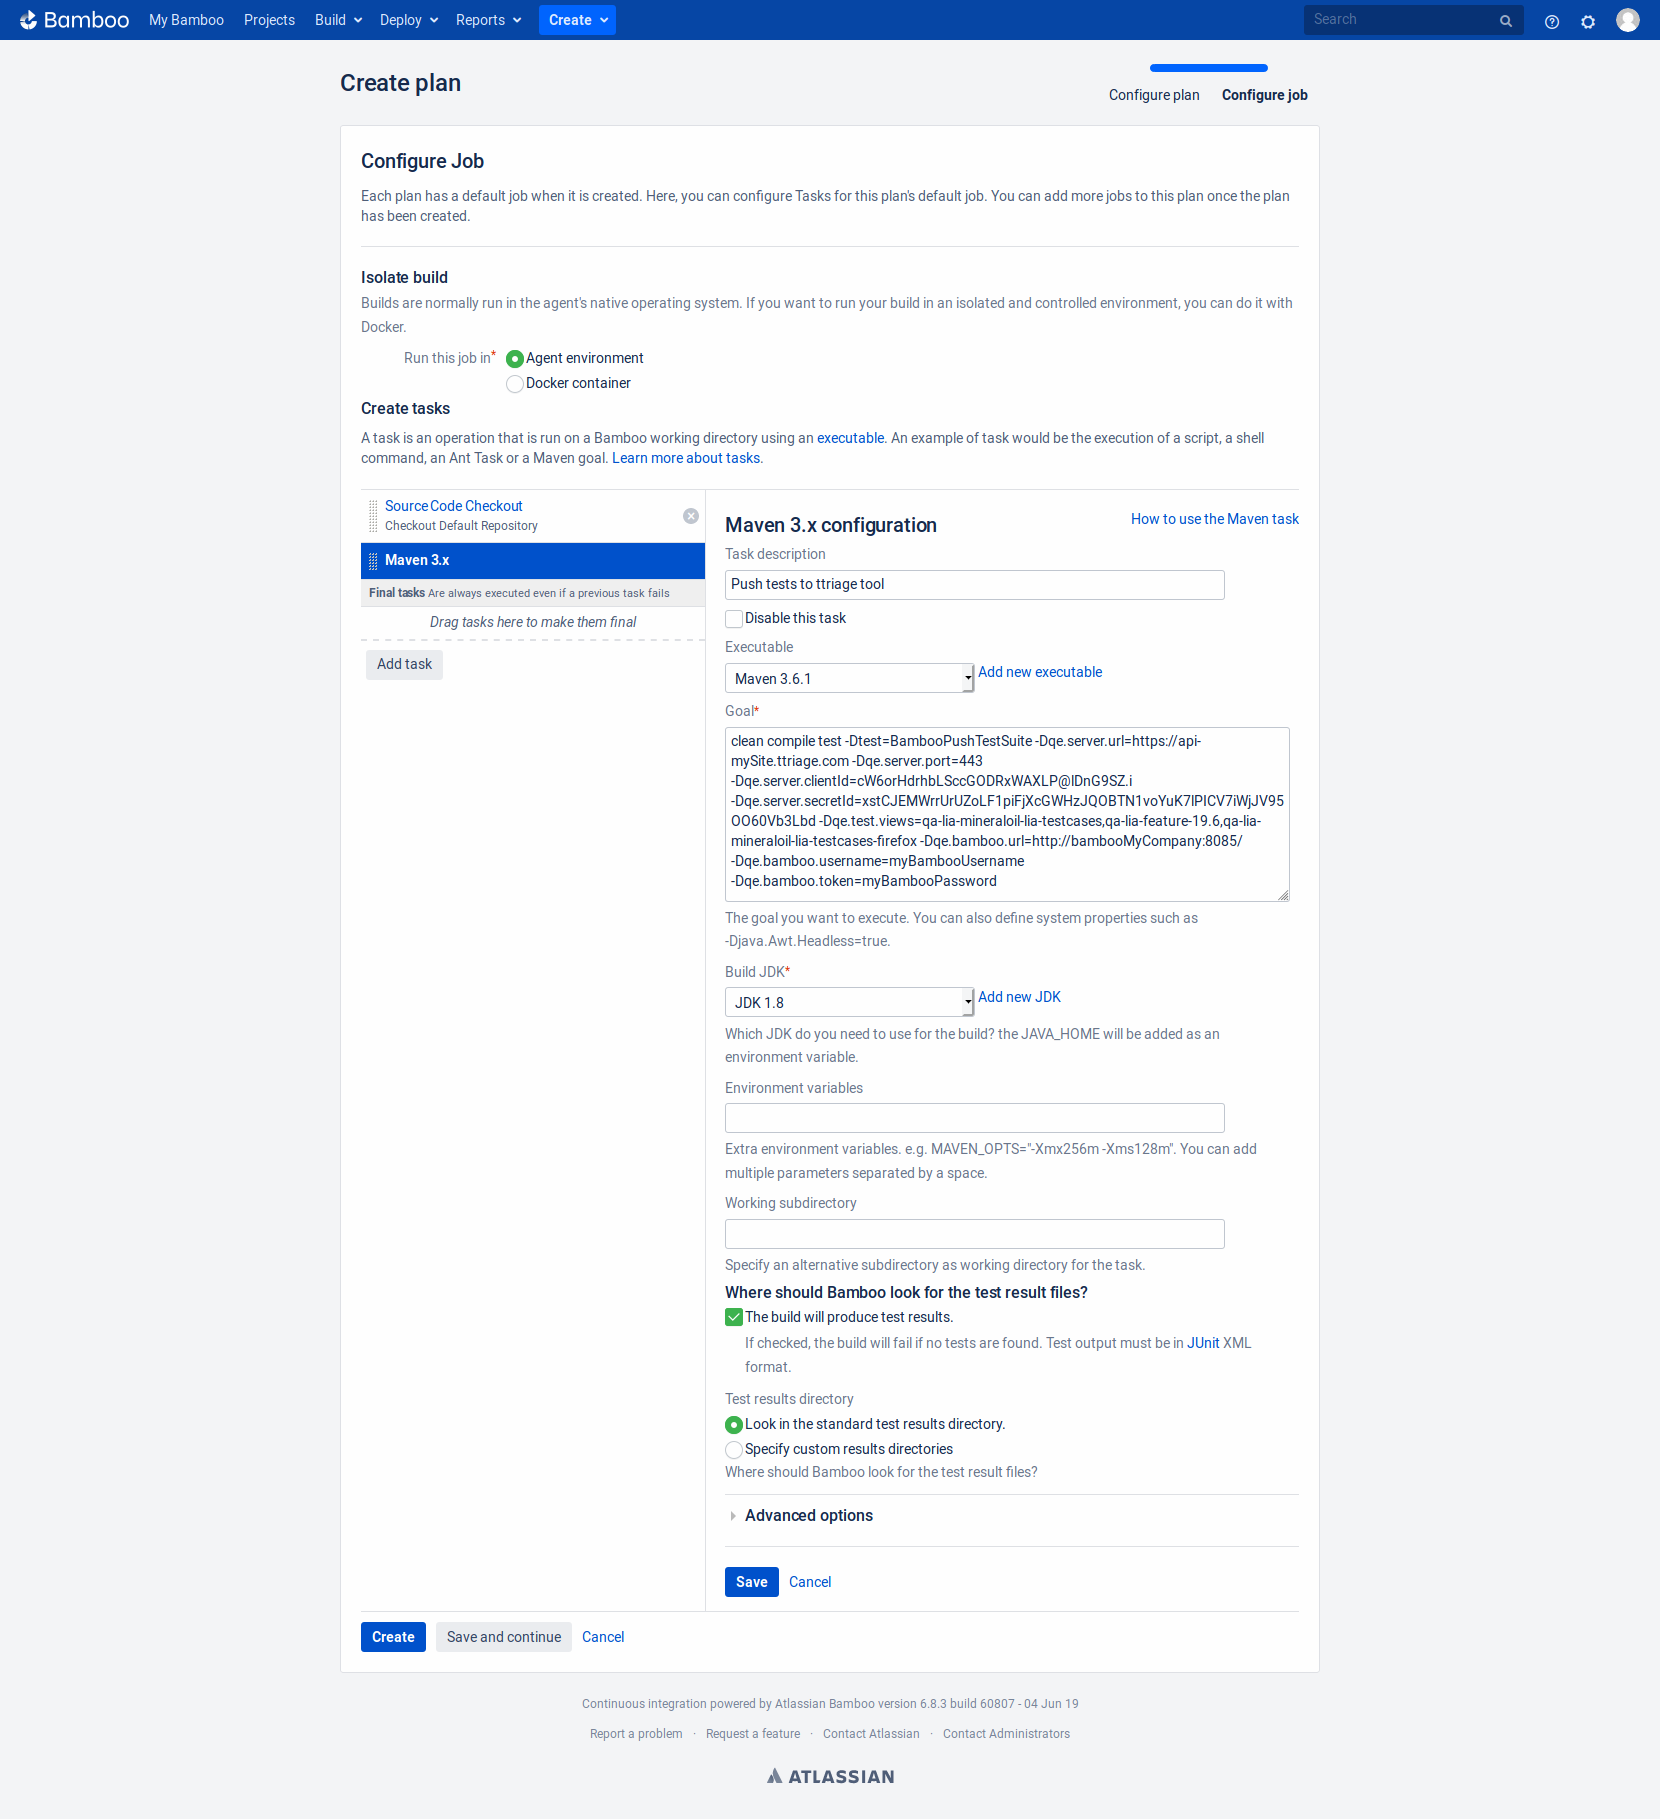
- Sample config goal:
clean compile test
-Dtest=BambooPushTestSuite
-Dqe.server.url=https://api-mySite.ttriage.com
-Dqe.server.port=443
-Dqe.server.clientId=cW6orHdrhbLSccGODRxWAXLP@lDnG9SZ.i
-Dqe.server.secretId=xstCJEMWrrUrUZoLF1piFjXcGWHzJQOBTN1voYuK7lPICV7iWjJV95OO60Vb3Lbd
-Dqe.test.views=qa-lia-mineraloil-lia-testcases,qa-lia-feature-19.6,qa-lia-mineraloil-lia-testcases-firefox
-Dqe.bamboo.url=http://bambooMyCompany:8085/
-Dqe.bamboo.username=myBambooUsername
-Dqe.bamboo.token=myBambooPassword
Note: Make sure to get the proper clientId and secretId: How-To: Pull / Push configuration
In order to not expose any user credential, you probably should ask Bamboo's admin to create a generic one with read-only permissions to parametrize in the Maven goal.
Users and permissions - Atlassian Documentation
The Maven job config should look like this:
 [click on the image to expand]
CI artifacts and reports see: HOW-TO: Configure artifacts in CI tool
Copyright (c) 2019, Clarolab. All rights reserved.
Comments